 Welcome to Part 2 of an ongoing series on the gitflow-helper-maven-plugin, and how to leverage it to simplify your CI configuration, artifact management, and deployment solution. Once again I’m going to be terse, and try to provide you with a bare-bones, step by step recipe to get going quickly with Jenkins, Bitbucket Server (Formerly Stash), and Nexus OSS.
Part 1 of this series contained the introduction of the gitflow-helper-maven-plugin as a means of teaching Maven how to behave for building different branches of gitflow projects.
Which brings us to the burning question anyone reading this likely has, “How do I make this work?”
Update 9/28/2016: After reviewing several issue reports on the github project, I realized that I copy-paste blundered the repository configuration in the maven XML snippet below. The stage repository should be configured so that uniqueVersion (the final boolean value in the URI) is false. Also the plugin version has been updated to the latest release, 1.5.0.
Setup Jenkins
- Install the following plugins:
- Create a new Job, and select “Maven Project” for the project type.
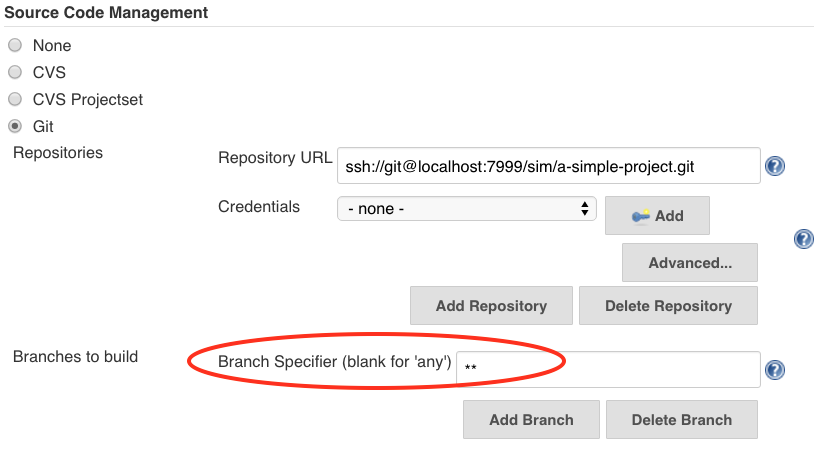
- In the “Source Code Management” section, configure your Git repository.
Set the “Branches to build” to empty, or “**” (two asterisks), so that all branches are built.
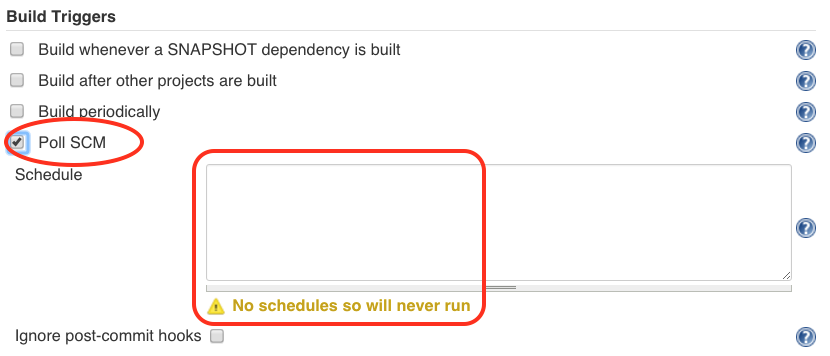
- Under the “Build Triggers” enable “Poll SCM“, but leave the schedule empty so that polling is never initiated by Jenkins unless provoked.
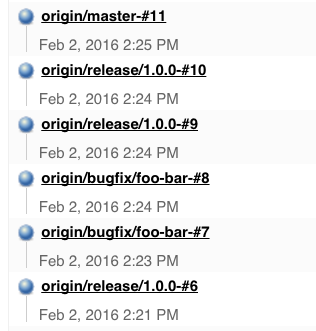
- Under “Build Environment” enable “Set Build Name“, and enter “${GIT_BRANCH}-#${BUILD_NUMBER}” to make it easy to identify what branch was built in the build history.

- Under the “Build” section, set the “Goals and options” to “clean deploy“.
Relax, it’s the gitflow-maven-helper-plugin. It’ll do the right thing for every branch.

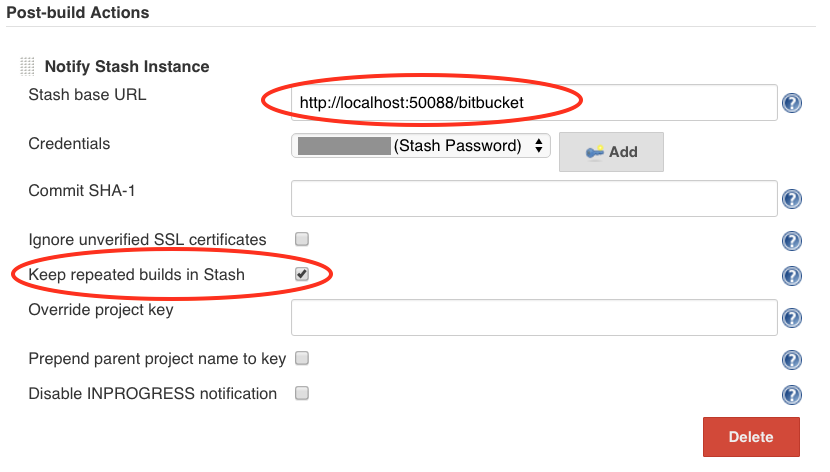
- Add a “Post-build Action” to “Notify Stash Instance“.
Configure your Stash base URL, credentials, etc.
I personally like to “Keep repeated builds in Stash“.
- In the “Source Code Management” section, configure your Git repository.
- Save.
That’s it. Your Jenkins job is setup.
Bitbucket Server (Stash)
- Install the Bitbucket Webhook to Jenkins

- In the “Setttings” for your repository, enable the Stash Webhook for Jenkins.

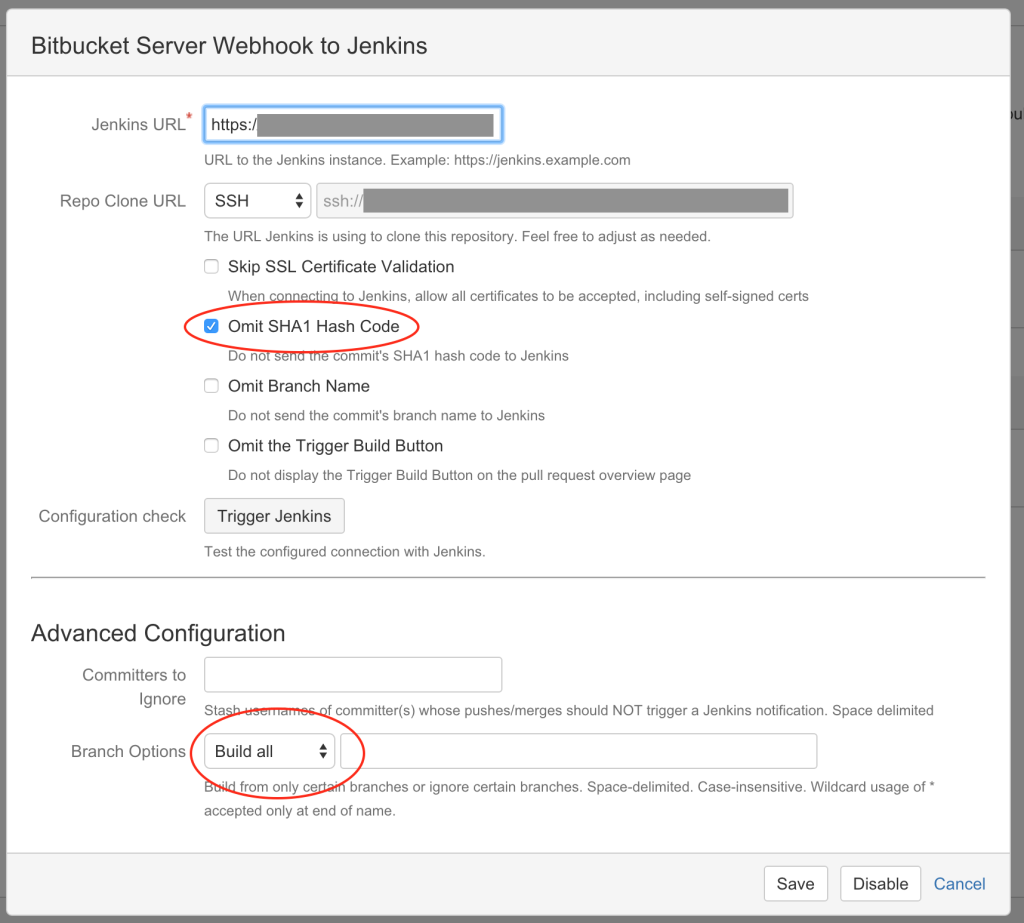
- Configure the hook.
- Set the Jenkins URL
- Ensure the Repo Clone URL is the same as the git URL in Jenkins.
- Enable “Omit SHA1 Hash Code“.
Leaving this disabled seems to cause duplicate builds of the same branch in some Jenkins versions, something you do not want to have happen on master branch merges. - Make sure you have selected “Build all” under “Branch Options”.
Create a “Stage” repository in Nexus OSS
- Login to Nexus OSS as a user with access to create repositories (or as an Admin).
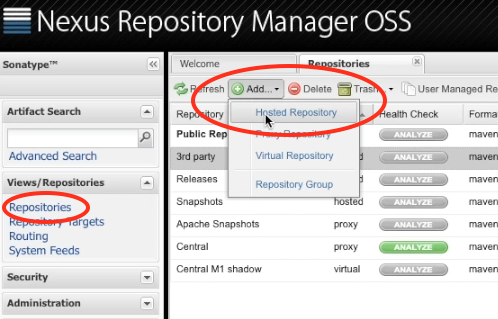
- On the “Repositories” view, Add a new “Hosted Repository“.
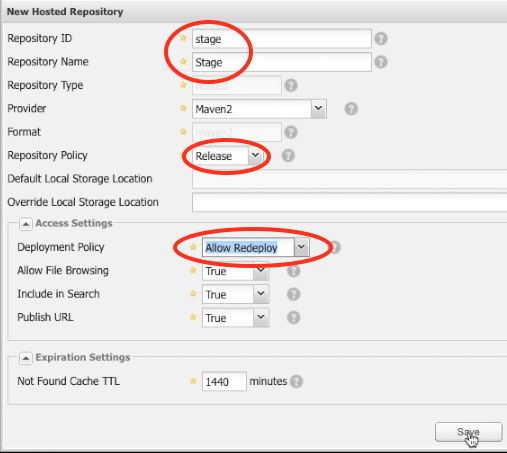
- Configure the Repository & Save
- Set the “Repository ID” to “stage“
- Set the “Repository Name” to “Stage“
- Set the “Repository Policy” to “Release“
- Set the “Deployment Policy” to “Allow Redeploy”
Add the gitflow-helper-maven-plugin to your Maven project descriptor
In a new branch, add the gitflow-helper-maven-plugin to your pom.xml using your favorite editor.
- Create a git branch to add the plugin.
git checkout -b feature/enable-gitflow-helper
- Add the following XML block, updating the URLs for your nexus configuration.
(This guide assumes you know how to configure Maven credentials for a nexus server)<build> <plugins> <plugin> <groupId>com.e-gineering</groupId> <artifactId>gitflow-helper-maven-plugin</artifactId> <version>1.5.0</version> <configuration> <releaseDeploymentRepository>nexus-server-id::default::http://path/to/releases/::false</releaseDeploymentRepository> <stageDeploymentRepository>nexus-server-id::default::http://path/to/stage/::false</stageDeploymentRepository> <snapshotDeploymentRepository>nexus-server-id::default::http://path/to/snapshots/::true</snapshotDeploymentRepository> </configuration> <extensions>true</extensions> <executions> <execution> <goals> <goal>enforce-versions</goal> <goal>retarget-deploy</goal> <goal>tag-master</goal> <goal>promote-master</goal> </goals> </execution> </executions> </plugin> </plugins> </build> - Commit and push the branch to the remote.
git commit -am "Added gitflow-helper"
git push -u origin feature/enable-gitflow-helper
- Check your Jenkins server to see if the build worked.
As things get going, your Jenkins job history will start to look like this:
Note: It is common for git builds to fail on the first execution of the build.
Don’t Panic! If the first build fails with messages about ‘git rev-parse null…’ click the ‘schedule build’ button in Jenkins, and the next run should work.
Enjoy and Explore
Kick the tires. Create a Pull Request from “feature/enable-gitflow-helper” to the “development” branch.
Giggle as you can see (and require) green build status in the Pull Request, prior to merging with the target branch.
Merge a pull request into the “development” branch, and watch Jenkins kick off a deployment to the Nexus “Snapshots” repository.
Merge the work into your current test release branch, and watch it deploy that to the “Stage” repository.
Throw a party the next time you merge into “master” and the Jenkins build promotes the artifacts from the “Stage” repository into the “Releases” repository, then tags the repository for you.
And you did it all with a single, rather simple, and proper CI job definition.
If you think you need a more complex layout, or you need to customize behavior, change goals, change branch name patterns, or would like some help implementing this in your environment, let us know. There’s also a more in-depth README in the plugin source. If you’re having issues with the plugin or want to request a feature, feel free to create an issue. If you’d like to contribute to the project, send us a pull request with your changes.
It’s worth noting that while this guide was for Jenkins & Nexus OSS, I’ve had success testing with Travis-CI and suspect the plugin is flexible enough to cover other CI server integrations as well.
Perhaps now that I’ve got the important how-to bits out of the way, the next part in this series could cover the organizational forces, decision points, goals, symptoms you should watch for when dealing with build processes.
 Another Best Places to Work Listing!